Although last year was a banner year for snow peas and cucumbers and other summer garden delights, the tomatoes here were a bust. And even the usually reliable yellow tomatoes didn’t perform well.  The cool summer was lovely, but not ideal for our beloved Solanum lycopersicums. While we can’t control the weather, there are some things we can do to tilt the scales towards happy, healthy and productive plants. Here are a few tips to get the tomatoes off and running this year:

  1. Build good soil – work compost into the soil (homegrown is the best – you know where it came from) before planting, use more of this good compost as a mulch
  2. Buy tomatoes from reputable nurseries  if you didn’t start from seed this year
  3. Balance hybrids with heirlooms – hybrids are bred to be resistant to wilts and blights and other diseases while heirlooms, grown for their superior taste, are less resistant
  4. Try grafted tomatoes – hardy root stock and heirloom top
    ~ Grafted tomatoes are starting to show up in some nurseries, or you can experiment with grafting (more on that topic later)
  5. Wait to plant until the soil has  thoroughly warmed before planting as there is no real benefit to getting the plants in the ground when it’s still cool
  6. Good drainage, good spacing between plants (2-3 feet), good support (here’s how to build a better tomato cage )
  7. Limit your use of fertilizer – excess fertilizer can lead to vegetative growth but not so much fruit production
  8. Rotating planting for all members of the nightshade family – not planting tomatoes, peppers, eggplants or potatoes in the same spot where a tomato, pepper, eggplant or potato was planted the previous year (hard to do in small urban garden!)

Other tips for growing good tomatoes?

Here’s hoping that Mother Nature cooperates and helps make this a banner year for tomatoes (and all the other good summer garden veggies). Because there’s nothing in the world like home grown tomatoes!

A bitter winter, a long and cold spring and still a ways to go before the soil is warm enough to plant the summer garden mainstays (tomatoes, peppers, cucumbers and melons). Garden stores have some plants for sale but the stock is still limited because of the cold. But getting a jump start on gardening is still possible through an unexpected (and inexpensive) source for gardens — the nearby grocery store. Below are just a few examples of grocery store produce that will produce in your garden.

Herbs:
The nearby grocery store sells potted herbs – basil, cilantro, parsley and mint. As an aside, basil and cilantro are easy to grow from seed, parsley and mint not so easy. The basil pot I bought  has 12 plants,the parsley pot has 6 plants – both on sale for $2.49/pot – twice the plants and half the cost($4.98) for an herb pot from the big box store.  Taking the herbs from a sheltered indoor environment to the outdoors requires a few days of hardening-off, but then into the ground they go and, based on previous years experience, up they’ll grow.

Lemongrass:
If you enjoy Southeast Asian cooking,  you’re probably familiar with dishes flavored with lemon grass (Cymbopogon citrates). Buy a stalk of lemon grass (choose one with the root end intact) from the grocery store, cut the foliage down to a few inches then place the stalk in a glass of water. In a few days, roots will emerge (as well as offshoots). Plant out when the weather has warmed, and the stalk will quickly turn into multiple stalks. Lemon grass is a grass, after all.  Tips on using lemongrass in cooking here and here.

Garlic:
Ever have a clove of garlic sprout? While the sprouted clove may be past prime for cooking, it is primed for planting. Plant with the tip pointed up; chances are it will sprout. And if it doesn’t, you haven’t lost anything but a few moments of time to plant the clove. More on growing garlic here.

Taro (and other roots):
Elephant ears are a tuber with dramatic heart shaped foliage, pricy at upwards of $10/tuber at gardening places.  Elephant ears is the descriptive name for the ornamental plant; they are  in the same family (colocasia) as taro or poi – important food crops in many parts of the world. While elephant ear tubers are not edible, you can buy taro roots (similar foliage as the ornamental elephant ear) for a fraction of the cost at the grocery store. Plant out after the danger of frost has passed, root side down. If it isn’t clear which is the top and which is the bottom, plant sideways and let Mother Nature figure it out!  Other grocery store roots to try are horseradish and ginger – both have grown successfully in my backyard garden.

Bottom line:
Twelve basil plants, six parsley plants, two lemon grass stalks (that will both become a large clump of stalks), an ornamental foliage plant (taro) and six garlics growing, all for under $8.  The frugal gardener in me approves.

grocery gardening

Tete a tete“In the spring, at the end of the day, you should smell like dirt” ~Margaret Atwood

Spring blooming bulbs are (finally!) underway and require no attention other than regular admiration but there is plenty to do in the garden during the longer spring days.

  • Start out with spring garden cleaning – cut down stalks of dead plants you left up all winter as habitat for overwintering insects, shake any remaining seed pods onto the ground (if you want plant seeds to self-sow) and clear away debris
  • Check your tools to see if any any wooden handles are dry (linseed oil is good for this) or need sharpening; check pots left outside to see if any have cracks.
  • If you haven’t had your soil tested, now’s a good time to do it. While local cooperative extension services often offer soil testing, UMass Amherst is also a good option.
    *  More useful information on soil testing in a previous post
  • Get going (if you haven’t done so already) on indoor seed starting – tomatoes and peppers and other plants that need to wait for warmer soils to be planted outside should be started 4-6 before average last frost date.  Useful instructions on seed starting from a previous post are right here, and instructions for an easy DIY seed starting stand (also from previous post) are right here.
  • Give the garden a good raking over to loosen the top soil and break up any clumps of dirt – this in preparation for sowing seeds for cool season planting.

GardenSeeds_2015What can be planted this time of year? Lots!

*  Greens: Lettuce, spinach, chard, mustard, kale
*  Root crops:  Carrots, radishes, beets, turnips, kohlrabi
*  Early peas such as snow peas and sugar snap

Here’s a planning calendar for what to plant and when plus an article on preparing your soil.

Yet another easier than pie fermentation experimentation – preserved lemons.

This requires just two ingredients – lemons and kosher salt. While traditionally Meyer lemons are used, I’ve found the garden variety grocery store lemons (4-5 per pint jar) are more than adequate. Scrub the lemons well, soak for a few minutes in a vinegar/water solution then rinse again. And then:

  1. Put a tbsp of kosher salt into the bottom of a sterilized pint sized jar
  2. Slice off the ends of each lemon then cut into quarters without cutting all the way through (keep the base intact)
  3. Gently open up each lemon and rub a tsp of salt on the pulp
  4. Stuff lemons into the jar as you go, leaving 1/2″ of headroom at the top
  5. Sprinkle another tbsp of salt on top then seal the jar
  6. Let the jar sit at room temperature (out of sunlight) for three days; a few times a day give the jar a shake and rotate it (upside down, then right side up)
    — If the juice doesn’t cover the lemons after the first day, add additional fresh squeezed lemon juice to cover
  7. After 3 days, put the lemons in the refrigerate, giving it a shake every so often to distribute juice and salt

The lemons will be ready when the rinds are soft (about 3 weeks). To use, peel off the pulp and wash the rind (to get rid of the surface salt).

Now, how to use these delicious aromatic bursts of concentrated lemon?  Add to soups and stews such as this delicious Moroccan tagine, grain salads like this, salad dressings and more.

And on a sunny Sunday afternoon, what could be be better than a salty collins (made with preserved lemons, of course)!

Pre-Preserved Lemon

Snowdrops
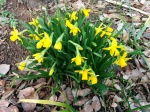
“Lone flower, hemmed in with snows and white as they but hardier far” ( Wordsworth, To a Snowdrop)

It’s been a long winter with polar vortexes and sub freezing temperatures, unusual for a typically mild mid-Atlantic clime.  Although spring is still around the corner and down the road a bit there are signs here that winter is winding down.Spring SnowGardener

Snowdrops emerged a few weeks ago, soon to be covered by almost a foot of snow. But these are no shrinking violets – when the snow melted the snowdrops were still in full bloom. Next on stage here at HeliosMonroe are crocuses, yellow first then other varieties. Although a favorite snack of the neighborhood squirrels when freshly planted, it seems that once the crocus become established the squirrels are off to greener pastures (and bulbs).  Daffodils won’t be far behind, and then irises and the rest of the seasonal bulbs.

“Spring is the time of plans and projects” (Tolstoy, Anna Karenina) but for now I’m going to pause and admire the flowers ~

FirstCrocus

My recent experimentation with fermentation was a great success which lead to new forays into this new (but ancient) world of preserving the harvest. Sauerkraut is easier than pie – cabbage, salt, and optional caraway seeds. Mixing red and green cabbage, adding grated carrots, red or daikon radish or just about any other vegetable you fancy are optional enhancements. Easy recipe for making sauerkraut in a mason jar here.

There are thousands of ways to make kimchi, but the basics typically have Napa cabbage, scallions, daikon radish and a mix of spices including ginger, garlic, fish sauce and gochugaru (Korean red pepper). I was fortunate in finding the gochugaru at one of my local markets, with the help of the Korean manager (who also gave me good advice on making my first batch of kimchi).  The recipe I used as a basis for making kimchi is right here. Once you get your kimchi going, try using it in this quinoa, kale and kim chi recipe, or check out these recipes.

Interested in more fermentation?  I recommend Sandor Ellix Katz’s Wild Fermentation as well as these two books he wrote:   The Art of Fermentation and (somewhat more  practical) Wild Fermentation.

Sauerkraut

Gardening in small spaces, making pickles, growing specialty crops, edible landscapes and healthy affordable food for all are just a few of the topics at the annual Rooting DC urban gardening forum. This day-long event – which includes panel discussions, workshops and talks –  is free (donations appreciated) and open to the public. The forum includes an info fair with lots of  great organizations coming to share opportunities and information.

Mark your calendar now for February 28th from 9:00am – 4:00pm at Wilson HS, advance registration is recommended.

rootingDC

Late winter is prime time to think about seed starting, and with a big order coming from Pinetree there will be plenty of seeds to be started. While many seeds are direct seeded, others need a head start (and some seed starting tips from previous HeliosMonroe posts can be found right here).

I made two seed starting stands using a design created by my mother;  a diagram and her original instructions are here: Betsey’s Seedling Starting Stand (circa 1900’s). Each stand holds six seed starting trays. Yes, I start lots and lots of plants from seed.  And with a bit of wood, screws and hinges, some shop lights and a few tools (and some space) you can make a stand (or two). When seed starting season is over, the stand is easy to fold up and store out of the way until next seed starting seasons rolls around.

For one stand, you’ll need:

*  54′ of 1″ x 2″furring strip (choose pieces that are as straight as possible)
*  Two pieces of 1/4″ or 3/8″ plywood (exterior is better):  16″ x 48″ and 24″ x 48″ — Many stores will cut the plywood to size (although you usually need to buy the whole sheet of plywood)
*  Two strap hinges
*  Phillips head screws
*  Three 4′ shop lights (I use one cool and one warm florescent light per shop light)
*  2-3′ of chain and 6 ‘S’ hooks, or rope — chain and hooks are often included with shop lights

Tools:  Saw, drill with philips head screwdriver bit, measuring tape

  1. Cut the furring strips: 4 x 72″ for the legs, 6 x 54″ for the sides; also cut 8 x 3″ pieces for the shelves
  2. For each piece of 72″ wood, mark the following measurements: 1″ from top, 25″ from top, 50″ from top (hint:  use a dark color & mark all the way across the strip)
  3. Place two pieces of 72″ wood on the floor, 54″ apart and parallel to each other
  4. Place three pieces of 54″ wood across the legs to form the sides – one piece just below the 1″ mark, one just below the 25″ mark and the third just below the 50″ mark
  5. Drill two screws at each intersection to secure the wood together
  6. Form the other side of the stand by repeating steps 3 – 5
  7. Attach strap hinges to the top of each leg on the underside – the stand will open and close like a tent, or laptop computer
  8. Make the shelves by securing a 3″ piece lengthwise to all four corners of the bottom of each piece of plywood; use two screws (per 3″ piece)
  9. Open the stand and place the smaller piece of plywood across the sides at the top of the stand, the larger piece goes across the sides at the bottom of the stand; the small 3″ pieces you screwed to the bottom of the plywood will “catch” the sides and hold the shelves in place
  10. Use rope or chain to hang the lights, you can adjust the height as the plants grow; for the bottom lights, it may help to attach ‘S’ hooks to a short bar to keep them in place

Tip:  Take a look at the diagram linked to above, and here. It helps.
IMG_3444

Having three bird feeders (two sunflower feeders plus a thistle feeder) and suet hanging by the farm kitchen door and window brings an endless stream of birds – chickadees, tufted titmice, cardinals, nuthatches, finches and lots of LBBs (little brown birds).  Ground feeders like morning doves and Chippy-Chippy the chipmunk enjoy the spillage; some of the sunflower seeds that survive will volunteer and turn into sunflower trees.

With all the inbound and outbound bird traffic, you’d expect occasional flight miscalculations would result in collisions with a windowpane or door pane but it just didn’t happen. Until a family member recently commented on the lack of bird/glass strikes — shortly after this comment was made a loud “BAM!” came from the kitchen door.

Just outside the door we could see a bird lying prone with it’s neck twisted in a way that seemed inconsistent with life. It was a juvenile male Cooper’s Hawk. After waiting a few minutes (and with no movement), I went out with a shovel and gloves to bury the body away from the house/dogs.

But when I rounded the corner, the bird was sitting up.  Not moving, but upright – a bird not a body – and definitely not dead yet! Wrapping a towel around Tommy (the Hawk) and taking him to a sheltered spot was the first step in getting him back on his feet. Or wings.

A quick Google search gave a few more suggestions:

*  Put the bird in a warm, dark spot and preferably in a container with a lid
*  Handle as little as possible
*  Keep the bird safe from children, pets, predators
*  Check on the bird periodically by taking the box outside and opening it – if the bird flies off then it has recovered
*  If the bird hasn’t recovered in a few hours, contact a nearby wildlife rehabilitator
— Rehabilitators are often listed under state Department of Natural Resources or in this Wildlife Rehab directory

Great suggestions on how to keep birds safe around windows is found on this excellent Cornell Lab of Ornithology web page.

The story had a happy ending – after spending time in the Hawk Recovery Room (former chicken house), Tommy the Hawk flew into the branches of the nearby Sycamore, then flew away. Goodbye Tommy, and please do your hunting somewhere else.

And after all this, we were only a bit late for the family dinner (our mother would have approved).

TommyCooper'sHawk

There’s no need to empty a rain gauge or wonder if it’s too windy for spraying.  A new weather station was installed on December 25th at the farm and it has this information, and lots more. Outside of the typical temperature, wind speed and direction, humidity and barometric pressure, etc there are a number of other useful measures including:

  • Phase of the moon– important to know whether the moon is waxing (time to plant above ground crops) or waning (plant root crops)
  • UV index – check before heading out to the garden for the right level of sunscreen
  • Solar radiation– useful to track when we go solar
  • Length of days – tomorrow will be 1 min 37 seconds longer than today, a hopeful spring-is-(almost)-around-the corner kind of sign

Great to know what’s happening at the farm however it doesn’t much help here at HeliosMonroe.   There is an Weather Underground station in nearby Columbia Heights, but it  might be a very different micro-climate.  There’s really only one thing to do — buy my own station.

weather